1. ListView/Pagination
이제 기존에 Lorem Picsum으로 간단히 적용해놓았던 List 페이지를 실제로 사용자가 입력하는 Article들의 리스트가 조회되도록 수정한다.
ListView 적용
임시로 적용해두었던 TemplateView를 ListView로 변경한다. ListView도 CRUD 관련 View들과 마찬가지로 django에서 기본적으로 제공해주는 view이며, 여기에는 pagination option도 지정할 수 있다.
articleapp/views.py
ArticleListView를 추가한다. ListView를 상속받고, paginate_by 옵션을 설정해준다. 5로 두어 한 페이지당 5개만 출력되도록 해본다.
class ArticleListView(ListView):
    model = Article
    context_object_name = 'article_list'
    template_name = 'articleapp/list.html'
    paginate_by = 5
artilceapp/urls.py 일부
TemplateView -> ArticleListView로 변경해준다.
# path('list/', TemplateView.as_view(template_name='articleapp/list.html'), name='list'),
path('list/', ArticleListView.as_view(), name='list'),
list.html 일부
{% if %}, {% for %} 구문을 이용하여 list에 있는 article을 a 링크로 만들고, 각 링크를 클릭하면 detail view로 이동할 수 있도록 만들어준다.
각 링크는 {% include ... with %} 구문을 사용하여 이미지가 들어가도록 했다. template을 분리하기 위해서 pragmatic/templates/snippets/card.html을 include 시켰고, with 구문을 사용했다. 여기서 등호 기준 좌측의 article은 card.html에서 사용할 article 변수를 정의하는 것이고, 우측의 article은 list.html의 for문에서 사용하는 article이다. 즉 card.html로 article 정보를 변수에 담아 넘겨주는 역할을 한다고 이해하면 된다. with 구문 사용시, 등호 기준 좌우에 공백이 있으면 안된다. 예를 들어 article=article이라고 적어야지, article = article이라고 적으면 오류가 난다...
MagicGrid를 위한 script 태그를 if문 안쪽으로 옮겨온 것도 유의하자. 정확한 원리는 자바스크립트 내용이겠지만, 어쨌든 if문으로 list가 존재할때만 magicGrid를 적용하는것은 상식적으로 맞아보인다.
{% if article_list %}
    <div class="container">
        {% for article in article_list %}
            <a href="{% url 'articleapp:detail' pk=article.pk %}">
                {% include 'snippets/card.html' with article=article %}
            </a>
        {% endfor %}
    <script src="{% static 'js/magicgrid.js' %}"></script>
    </div>
{% else %}
    <div>
        <h1>No Articles YET!</h1>
    </div>
{% endif %}

<div style="text-align: center">
    <a href="{% url 'articleapp:create' %}" class="btn btn-dark rounded_pill col-3 mt-3 mb-3">
        Create Article
    </a>
</div>

{#    <script src="{% static 'js/magicgrid.js' %}"></script>#}
pragmatic/templates/snippets/card.html
(snippet은 단편, 작은 조각이라는 뜻이 있다고 한다.)
<div>
    <img src="{{ article.image.url }}" alt="">
</div>
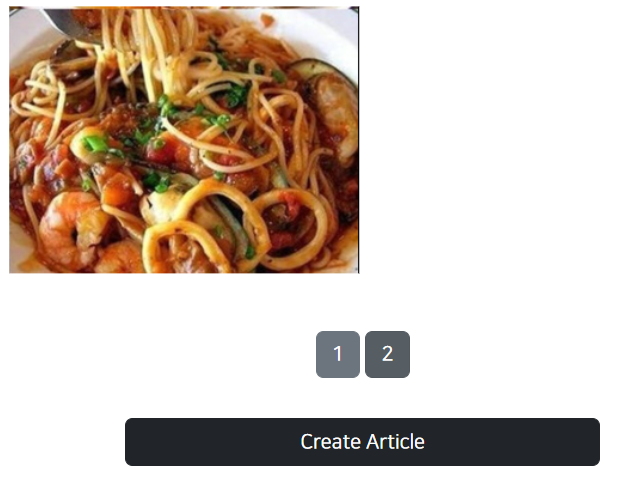
결과확인
http://localhost:8000/articles/list/?page=1과 같이 page에 대한 쿼리스트링을 url에 넣어주어 확인이 가능하다.

Pagination 표시
url이 아니라 버튼으로 page 이동이 가능하도록 해준다. pagination도 snippets로 만든다. 여기서는 일반적인 페이지 표시 방식이 아니라 간소화된 방식을 적용한다. 전부 표시하거나 infinite scroll 같은걸로 표기하려면 자바스크립트 코딩이 필요하다.
articleapp/list.html 일부
{# ..중략 #}
{% endif %}

{% include 'snippets/pagination.html' with page_obj=page_obj %}

<div style="text-align: center">
    <a href="{% url 'articleapp:create' %}" class="btn btn-dark rounded_pill col-3 mt-3 mb-3">
        Create Article
    </a>
</div>
{# ..생략 #}
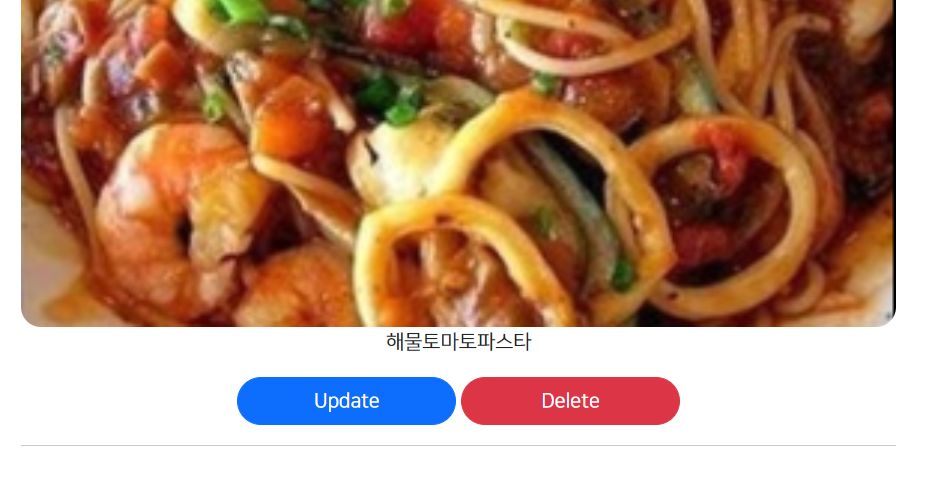
그리고 detail 페이지의 내용 및 버튼 표시 로직, 디자인 등을 일부 수정한다.
articleapp/detail.html
{% extends 'base.html' %}
{% load bootstrap4 %}

{% block content %}
    <div style="text-align: center; max-width: 700px; margin: 4rem auto">

        <h1>
            {{ target_article.title }}
        </h1>
        <h5>
            {{ target_article.writer.profile.nickname }}
        </h5>
        <img style="width: 100%; border-radius: 1rem;"
             src="{{ target_article.image.url }}" alt="">

        <p>
            {{ target_article.content }}
        </p>

        {% if target_article.writer == user %}
            <a href="{% url 'articleapp:update' pk=target_article.pk %}"
            class = "btn btn-primary rounded-pill col-3">
                Update
            </a>
            <a href="{% url 'articleapp:delete' pk=target_article.pk %}"
            class = "btn btn-danger rounded-pill col-3">
                Delete
            </a>
        {% endif %}
    <hr>
    </div>
{% endblock %}
2. Mixin
이제 Article Detail 페이지에 들어갈 댓글을 표시해주기 위해서 CommentApp을 작성할 것이다. Article:Comment = 1:N의 구조로 생성된다. 그런데, 이를 ArticleDetailView에 모두 표시해주고, 관계를 갖게 하기 위해서 ArticleDetailView의 pk값을 comment가 갖도록, ArticleDetailView에서도 form_class의 적용이 필요하다.
class ArticleDetailView(DetailView):
    model = Article
    context_object_name = 'target_article'
    template_name = 'articleapp/detail.html'
기존 ArticleDetailView. 단순 조회용이므로 Form이 필요없기 때문에 form_class를 적용하지 않았다. 부모 모듈인 DetailView-BaseDetailView에도 form_class 속성은 존재하지 않는다. BaseDeleteView등과 같이 기본적으로 form_class를 사용하는 View들은 form_class 속성이 존재한다.
이를 해결하기 위해 상속받는 모듈이 Mixin이다. 기존 DetailView 외에 FormView도 같이 상속하면 form_class를 사용할 수 있게 된다. 실제로 CommentApp을 만들면서 Mixin의 적용 방법에 대해서 알아보자.
3. CommentApp 생성
CommentApp을 만든다. 여태까지 반복적으로 해왔던 작업이므로 반복적인 코드들은 생략하고 새로 배울 점들만 작성한다.
1. 앱 생성 'python manage.py startapp commentapp'
2. 메인 모듈 INSTALLED_APP 등록, urls에 등록
3. commentapp/urls.py 생성(appname 지정)
4. models.py 생성 - article과 user를 1:N으로 관계 맺어준다.
class Comment(models.Model):

    article = models.ForeignKey(Article, on_delete=models.SET_NULL, null=True, related_name='comment')
    writer = models.ForeignKey(User, on_delete=models.SET_NULL, null=True, related_name='comment')

    content = models.TextField(null=False)
    created_at = models.DateTimeField(auto_now=True)
5. commentapp/forms.py : CommentCreationForm 생성 - text만 받으며, article, user는 서버에서 설정한다.
class CommentCreationForm(ModelForm):
    class Meta:
        model = Comment
        fields = ['text']
6. migration 진행
7. CommentCreateView 생성
class CommentCreateView(CreateView):
    model = Comment
    form_class = CommentCreationForm
    template_name = 'commentapp/create.html'

    def get_success_url(self):
        return reverse('articleapp:detail', kwargs={'pk': self.object.article.pk})
8. urls.py에 urlpatterns에 createview 등록
9. create.html 생성
comment를 create 하기 위해서 Comment model에 있는 writer(user)와 article 정보를 추가해줘야할 것이다. user 정보는 앞서 다른 app에서 했던 것처럼 View에서 처리할 것이나, article 정보는 create.html 에서 form 태그에서 함께 전달하는 방식을 이용할 것이다. 따라서 hidden타입 input 태그를 두어 value = {{ article.pk }} 라는 값으로 전달해준다. 이렇게 하는 이유는 화면상 articleapp/detail.html 페이지에 commentapp/create.html이 포함되어야하기 때문이다. 또한 이런 value 값은 hidden으로 해놨더라도 개발자 도구에 접근하여 조작이 가능하다는 것도 인지하고 있어야 한다.
{%  extends 'base.html' %}
{% load bootstrap4 %}

{% block content %}
    <div style="text-align: center; max-width: 500px; margin: 4rem auto">
    <div class="mb-4">
        <h4>Create Article</h4>
    </div>
        <form action="{% url 'commentapp:create' %}" method="post">
            {%  csrf_token %}
            {% bootstrap_form form %}
            <input type="submit" class="btn btn-dark rounded-pill col-6 mt-3">
            <input type="hidden" name="article_pk" value="{{ article.pk }}">
        </form>
    </div>
{% endblock %}
10. articleapp/detail.html 수정
위에서 작성한 create.html을 넣는다. include ... with 구문을 사용하여 comment와 연결된 article을 지정해준다.
articleapp/detail.html의 일부
다시 한 번... with 구문에서 등호 좌우로 공백이 없어야하는 것에 유의하자..
{% endif %}
    <hr>
{% include 'commentapp/create.html' with article=target_article %}
</div>
11. ArticleDetailView : FormMixin 추가
이제 ArticleDetailView에서 commentCreation을 받을 수 있도록 Mixin 및 form_class 옵션을 설정해준다.
class ArticleDetailView(DetailView, FormMixin):
    model = Article
    form_class = ArticleCreationForm
    context_object_name = 'target_article'
    template_name = 'articleapp/detail.html'
12. CommentCreateView에 article, user정보 추가
comment template에서 넘어온 form 입력 정보와 함께 article, user 정보를 추가하여 저장할 수 있도록 만들어준다.
commentapp/views.py일부
class CommentCreateView(CreateView):
    model = Comment
    form_class = CommentCreationForm
    template_name = 'commentapp:create.html'

    def form_valid(self, form):
        temp_comment = form.save(commit=False)
        temp_comment.article = Article.objects.get(pk=self.request.POST['article_pk'])
        temp_comment.writer = self.request.user
        temp_comment.save()
        return super().form_valid(form)
self.request로부터 article, user 정보를 얻어와서 set 해준 뒤 save 하는 로직이다.
4. Commentapp 다듬기
댓글 작성 시 로그인 여부 체크
로그인한 사용자만 댓글을 달 수 있도록 검증 로직을 추가한다.
Commentapp:create.html 일부
articleapp:detail 페이지와 extends base.html 구문이 중복될 수 있으므로 해당 구문은 삭제한다.
?next 구문을 사용하여 로그인 후 이전 요청 url로 redirect 해준다.
text input 태그는 내가 직접 넣었다. 강의에서는 {% bootstrap form form %}을 사용했는데, 이유는 알 수 없지만 자꾸 article create에서 사용하던 title, image, content를 입력하는 양식이 불러와져서 그냥 양식을 직접 만들었다.
# {% extends 'base.html' %} 구문 삭제

#...중략
<form action="{% url 'commentapp:create' %}" method="post">
    {% csrf_token %}
    {% if user.is_authenticated %}
        <input type="text" class="form-control" name="content">
        <input type="submit" class="btn btn-dark rounded-pill col-6 mt-3">
    {% else %}
        <a href="{% url 'accountapp:login' %}?next={{ request.path }}"
           class="btn btn-dark rounded_pill col-6 mt-3">
            Login
        </a>
    {% endif %}
    <input type="hidden" name="article_pk" value="{{ article.pk }}">
</form>
CommentList 추가
작성된 댓글들을 볼 수 있는 CommentListView를 추가한다.
1. articleapp/detail.html에 list 추가
articleapp/detail.html의 일부
for문 내부에 include 구문을 사용하였다.
.all 로 관련 엔티티의 모든 값을 list로 불러올 수 있다.
    {% endif %}
    <hr>
{% for comment in target_article.comment.all %}
    {% include 'commentapp/detail.html' with comment=comment %}
{% endfor %}
2. commentapp/detail.html 작성
 로 띄어쓰기를 추가하였고, strong 태그로 사용자의 nickname을 강조하였다.
<div style="text-align: left; padding: 4%; margin: 1rem 0; border-radius: 1rem;
border: 1px solid #bbb;">
<div>
<strong>
{{ comment.writer.profile.nickname }}
</strong>
   
{{ comment.created_at }}
</div>
<div style="margin: 1rem 0;">
{{ comment.content }}
</div>
</div>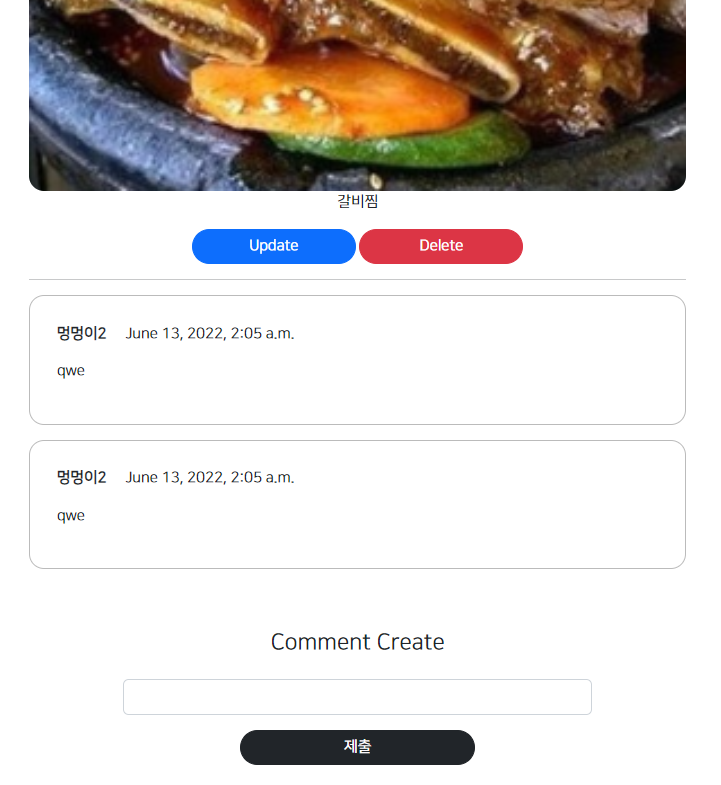
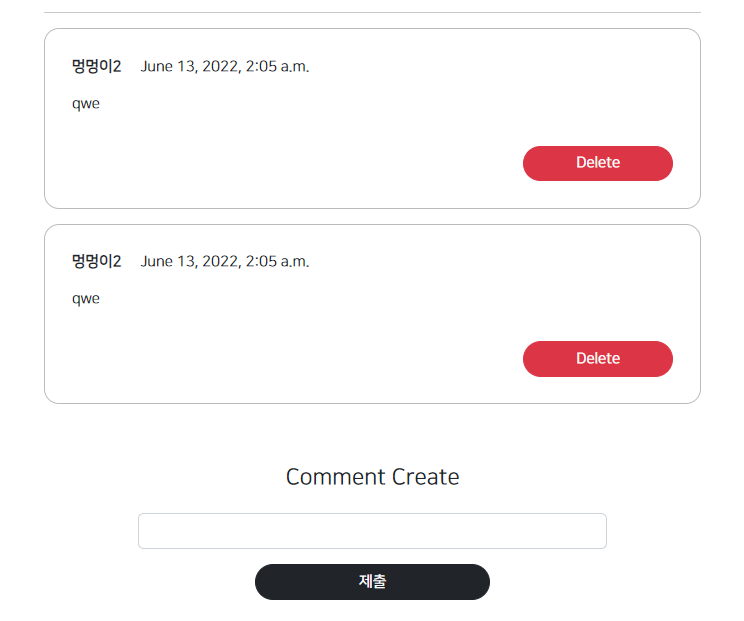
DeleteView 추가
마지막으로 DeleteView를 추가한다. DeleteView는 다른 app과 별다른 점이 없으므로 작성 과정만 메모해둔다.
1. CommentDeleteView 추가
2. urls.py 에 pattern 등록
3. delete.html 생성
4. comment_ownership_decorator 추가 : 댓글의 작성자 일때만 delete 버튼이 나오게 한다.
참조
1. 작정하고 장고! Django로 Pinterest 따라만들기 : 바닥부터 배포까지-박형석님 인프런 강의
'Programming-[Backend] > Django' 카테고리의 다른 글
| Django로 Pinterest 따라 만들기-14. ProjectApp 만들기, MultipleObjectMixin (0) | 2022.06.13 |
|---|---|
| Django로 Pinterest 따라 만들기-13. MobileResponsive Layout 구현 (0) | 2022.06.13 |
| Django로 Pinterest 따라 만들기-11. MagicGrid 활용, ArticleApp CRUD 완성하기 (0) | 2022.06.10 |
| Django로 Pinterest 따라 만들기-10. Profileapp 마무리, 리팩토링 (0) | 2022.06.10 |
| Django로 Pinterest 따라 만들기-9. ModelForm 사용, Profileapp 구현 (0) | 2022.06.09 |


