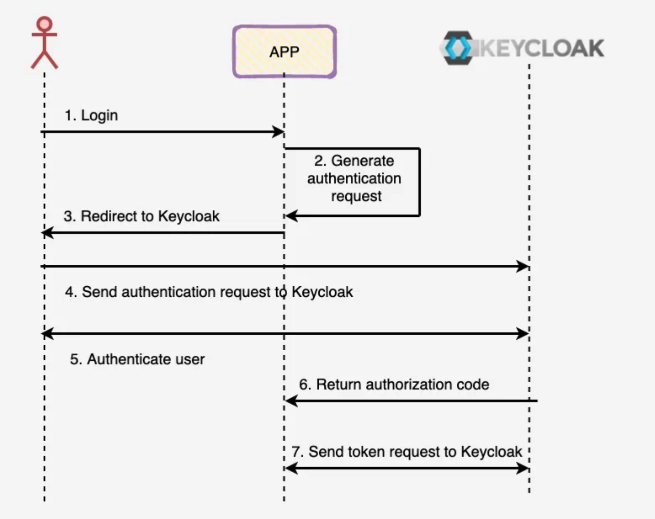
1. Device flow 개념
Ref.) https://blog.please-open.it/device_code/

Device flow는 스마트 TV 등 사용자가 인증 정보를 직접 입력하기 어려운 환경에서 스마트폰 등 입력이 편한 환경에서 로그인 할 수 있도록 인증 기기를 대체하는 방식이다. 넷플릭스 등에서 인증 시, QR 코드를 스캔하여 핸드폰으로 로그인하는 방식이라고 이해하면 된다.
2. 백엔드 구현
- Keycloak 설정: Client - 특정 client 선택 - Capability Config - OAuth 2.0 Device Authorization Grant를 활성화한다.
- device flow를 위한 Endpoint로 다음과 같이 로그인 요청을 보낸다.
curl --location --request POST 'https://app.please-open.it/auth/realms/--realmid--/protocol/openid-connect/auth/device' \
--header 'Content-Type: application/x-www-form-urlencoded' \
--data-urlencode 'client_id=--client_id--' \
--data-urlencode 'client_secret=--client_secret--'
3. 다음과 같은 응답이 온다. verification_uri로 접속하면 user_code를 입력해야하고, verification_uri_complete로 접속 시 user_code가 자동 입력되어 사용자 로그인 페이지로 이동한다. verification_uri_complete를 QR Code로 만들고 다른 Device로 촬영하면 사용자가 다른 Device에서 로그인할 수 있으므로 Device flow이다.
{
    "device_code": "0tNVhQxNbgA-F3s344YYZBsw0njBgZK_zPBaVzKvAFs",
    "user_code": "TQMZ-OSNL",
    "verification_uri": "http://localhost:8080/realms/{realmId}/device",
    "verification_uri_complete": "http://localhost:8080/realms/{realmId}/device?user_code=TQMZ-OSNL",
    "expires_in": 600,
    "interval": 5
}
4. 클라이언트는 다음 url을 polling하고 있어야한다. 실제 유저가 로그인 전까지는 pending 응답이 오고, 유저 로그인 후에는 access_token등 토큰 정보가 아래와 같이 넘어온다.
curl --location --request POST 'https://app.please-open.it/auth/realms/--realmid--/protocol/openid-connect/token' \
--header 'Content-Type: application/x-www-form-urlencoded' \
--data-urlencode 'device_code=--device_code--' \
--data-urlencode 'client_id=--client_id--' \
--data-urlencode 'client_secret=--client_secret--' \
--data-urlencode 'grant_type=urn:ietf:params:oauth:grant-type:device_code' - 응답: pending 중일 때
{
    "error": "authorization_pending",
    "error_description": "The authorization request is still pending"
}- 응답: 유저가 로그인 한 이후
{
    "access_token": "eyJhbG...",
    "expires_in": 300,
    "refresh_expires_in": 1800,
    "refresh_token": "eyJhbG...",
    "token_type": "Bearer",
    "not-before-policy": {TIMESTAMP 값},
    "session_state": "{UUID로 된 state값}",
    "scope": "email profile"
}
3. Frontend 구현
로그인 버튼을 눌렀을 때 팝업창을 띄우고, 백엔드에서 받아오는 verification_complete_uri 값을 QR로 만든다. 핸드폰으로 QR 촬영 후 사용자가 로그인을 처리하면 로그인이 되도록 polling을 한다.
React로 만들었고, handleLoginClick 코드 부분만 대략적으로만 기록해놓는다.
const handleLoginClick = async () => {
  popupRef.current = window.open(
      'about:blank',
    '_blank', // 새 창에서 열기
    'width=500,height=700'
  );

  try {
    // 첫 번째 POST 요청
    const response = await fetch('{백엔드 endpoint 주소}', {
      method: 'POST',
      headers: {
        'Content-Type': 'application/json',
      },
      body: JSON.stringify({ client_id: '클라이언트 id' }),
    });

    const data = await response.json();

    const { verification_uri_complete, device_code, expires_in, interval } = data;

    // QR 코드 생성
    const qrCodeUrl = await QRCode.toDataURL(verification_uri_complete);

    popupRef.current.document.body.innerHTML = `
      <h2>QR 코드를 스캔하여 로그인을 진행해주세요</h2>
      <img src="${qrCodeUrl}" alt="QR Code" />
      <p>${expires_in} 초 내에 로그인 해주세요</p>
    `;

    popupRef.current.document.getElementById("deviceLoginButton").onclick = handleDeviceLoginClick;


    // 두 번째 요청을 위한 polling 시작
    const pollLogin = async () => {
      let timeElapsed = 0;

      while (timeElapsed < expires_in) {
        await new Promise((resolve) => setTimeout(resolve, interval * 1000));

        const pollResponse = await fetch('{백엔드 토큰 포인트 주소}', {
          method: 'POST',
          headers: {
            'Content-Type': 'application/json',
          },
          body: JSON.stringify({ client_id: '{클라이언트 id}', grant_type: 'urn:ietf:params:oauth:grant-type:device_code', device_code }),
        });

        // const pollData = await pollResponse.json();
        const responseText = await pollResponse.text();

        // 데이터가 JSON 형식으로 제대로 수신되지 않는 경우에 대비
        let accessToken = null;
        let refreshToken = null;


        try {
          // JSON 파싱 시도
          const pollData = JSON.parse(responseText);
          // access_token과 refresh_token 추출
          accessToken = pollData.access_token;
          refreshToken = pollData.refresh_token;

          if (pollData.error) {
            popupRef.current.document.body.innerHTML += `<p>사용자의 로그인을 기다리고 있습니다.</p>`;
          } else if (pollData.access_token && pollData.refresh_token) {
            saveTokens(pollData.access_token, pollData.refresh_token);
            popupRef.current.document.body.innerHTML = `<p>로그인 성공</p>`;
            setTimeout(() => popupRef.current.close(), 3000);
            return;
          }

        } catch (e) {
          // 파싱 오류 발생 시 텍스트 내에서 직접 추출 시도
          console.error("JSON 파싱 오류:", e);

          // access_token 추출
          const accessTokenMatch = responseText.match(/"access_token":"(.*?)"/);
          if (accessTokenMatch) {
            accessToken = accessTokenMatch[1];
          }

          // refresh_token 추출
          const refreshTokenMatch = responseText.match(/"refresh_token":"(.*?)"/);
          if (refreshTokenMatch) {
            refreshToken = refreshTokenMatch[1];
          }

          saveTokens(accessToken, refreshToken);
          popupRef.current.document.body.innerHTML = `<p>로그인 성공</p>`;
          setTimeout(() => popupRef.current.close(), 3000);
          return;
        }

        timeElapsed += interval;
      }

      popupRef.current.document.body.innerHTML += `<p>시간이 만료되었습니다</p>`;
    };

    await pollLogin();
  } catch (error) {
    console.error('로그인 중 오류:', error);
    if (popupRef.current) {
      popupRef.current.document.body.innerHTML = `<p>오류 발생: ${error.message}</p>`;
    }
  }
};
추가로, 자체 테스트를 진행할 경우, 내 컴퓨터에서 인식하는 localhost와 모바일에서 인식하는 localhost가 다르기 때문에, 백엔드 서버의 주소 및 Keycloak의 Frontend URL 값을 '터미널 -> ifconfig -> en0' 에 해당하는 ip 주소값과 포트 번호로 변경해주어 테스트해야한다.
대략 이런 화면을 만들어서 테스트했다.

'Programming-[Backend] > Keycloak' 카테고리의 다른 글
| Keycloak Email 서버 테스트 with Mailtrap (0) | 2024.09.20 |
|---|---|
| Keycloak <-> Okta SAML 연동, Attribute to Role (0) | 2024.09.19 |
| [TIL] Keycloak logout (0) | 2024.09.09 |
| Authorization flows with Keycloak(CIBA, PKCE, Auth-code, SA) (0) | 2024.09.08 |
| Keycloak - 12. Keycloak 확장 (0) | 2024.08.10 |


