1. 프로젝트 생성 및 초기 세팅
늘 하던대로 start.spring.io 사이트에서 프로젝트를 생성한다. 다만 Group은 hello, Artifact는 thymeleaf-basic 이라고 하되, 자동완성되는 package name은 hello.thymeleaf 까지만 작성한다. packaging은 Jar, Java 11버전, Gradle PJT로 진행한다. dependency는 Spring web, lombok, thymeleaf를 설정한다.

늘 하던대로~ annotation processor를 enabled로 바꿔주고, Build Tools를 intelliJ로 바꿔준다.
resources/static/index.html 파일을 넣어준다. view 조회 경로를 미리 지정해놓은 html 파일이다.

2. 타임리프 기능 살펴보기 (다음 글 계속)
타임리프는 백엔드 서버에서 서버사이드 렌더링을 하기 위한 템플릿 엔진이다. 클라이언트 사이드 렌더링을 하면 사용자와 상호작용을 하거나, 더 멋진 기능들을 만들 수 있지만, 백엔드 개발자가 간단한 게시판 같은 기능을 구현하는데 그 모든 기능을 알 필요는 없다. 이런 기능 구현을 위해 템플릿 엔진 하나 정도는 알고 있으면 개발에 도움이 된다. 그리고 스프링이 추천하는 타임리프를 배우는 것을 권장한다. 문법도 간단해서 금방 배울 수 있다.
기능들을 하나씩 살펴보자. 강의에서 나온 내용만 해도 상당하다. 일단 문법들을 쭉 훑어보며 중요-예외 사항들을 파악하고, 나중에 사용할 때 직접 사용하면서 익숙해지면 될 것 같다.
text, utext
text
url로 들어오는 데이터를 바인딩하여 text로 보여주는 문법은 간단하다. 태그 속성으로 쓰는 방식과 인라인 방식이 있다.
th:text="${원하는 데이터}"
[[${원하는 데이터}]]
실습을 위해 BasicController와 text-basic.html 파일을 작성하자

java/hello/thymeleaf/basic/BasicController.java
| 1 2 3 4 5 6 7 8 9 10 |
@Controller @RequestMapping("/basic") public class BasicController { @GetMapping("text-basic") public String textBasic(Model model) { model.addAttribute("data", "Hello Spring!"); return "basic/text-basic"; } } Colored by Color Scripter |
cs |
resources/templates/basic/text-basic.html
| 1 2 3 4 5 6 7 8 9 10 11 12 13 14 15 16 17 18 |
<!doctype html> <html xmlns:th="http://www.thymeleaf.org"> <head> <meta charset="UTF-8"> <meta name="viewport" content="width=device-width, user-scalable=no, initial-scale=1.0, maximum-scale=1.0, minimum-scale=1.0"> <meta http-equiv="X-UA-Compatible" content="ie=edge"> <title>Document</title> </head> <body> <h1>컨텐츠에 데이터 출력하기</h1> <ul> <li>th:text 사용 <span th:text="${data}">아무거나 블라블라</span></li> <li>컨텐츠 안에서 직접 출력 [[${data}]]</li> </ul> </body> </html> Colored by Color Scripter |
cs |
타임리프를 사용하기 위해서 html 태그에 xmlns:th="http://www.thymeleaf.org" 구문을 넣어주었다. 서버 재실행 후, localhost:8080/basic/text-basic에 접속해보면 잘 출력되는 것을 확인할 수 있다.
유의할 점은, th:text로 적용된 타임리프의 text값이 출력되고, 해당 <span>태그 내부의 HTML 컨텐츠는 출력되지 않는다는 점이다. 타임리프가 적용된 <sapn> 태그의 "아무거나 블라블라" 라는 컨텐츠는 출력되지 않았다.

utext
utext는 unescaped text의 약자이다. 이스케이프를 안한다는 것인데, 타임리프는 기본적으로 이스케이프 기능을 지원한다. html문서는 <, >와 같은 특수문자를 기반으로 동작하는데, 사용자가 html 태그 등으로 의도하지 않은 특수문자는 html 엔티티로 변환하게 된다. 예를 들어 <span> Hello <b>Spring!</b> </span> 라고 작성한다면, 사용자의 의도는 Spring!이라는 글자를 볼드체로 표기하고 싶은 것일 것이다. 그러나 실제로 "<b>Spring</b>"라는 문자를 출력하고 싶은 것일수도 있다. 이에 따라 타임리프는 이스케이프를 적용하여 < 문자는 <, > 문자는 > 등의 html 엔티티로 변환한다.
그래서, 태그 내용을 반영하고 싶은 경우에는 언이스케이프(unescape)를 적용해야 한다. 언이스케이프가 적용된 text를 타임리프에서는 utext라고 부르며, 아래와 같은 문법으로 구현할 수 있다. 두번째 인라인 문법은 대괄호 [] 중 하나가 소괄호 ()로 바뀐 형태이다.
th:utext="${원하는 데이터}"
[(${원하는 데이터})]
java/hello/thymeleaf/basic/BasicController.java
| 1 2 3 4 5 |
@GetMapping("text-unescaped") public String textUnescaped(Model model) { model.addAttribute("data", "Hello <b>Spring!</b>"); return "basic/text-unescaped"; } Colored by Color Scripter |
cs |
resources/templates/basic/text-unescaped.html
| 1 2 3 4 5 6 7 8 9 10 11 12 13 14 15 16 17 18 19 20 21 22 23 |
<!DOCTYPE html> <html xmlns:th="http://www.thymeleaf.org"> <head> <meta charset="UTF-8"> <title>Title</title> </head> <body> <h1>text vs utext</h1> <ul> <li>th:text = <span th:text="${data}"></span></li> <li>th:utext = <span th:utext="${data}"></span></li> </ul> <h1><span th:inline="none">[[...]] vs [(...)]</span></h1> <ul> <li><span th:inline="none">[[...]] = </span>[[${data}]]</li> <li><span th:inline="none">[(...)] = </span>[(${data})]</li> </ul> </body> </html> Colored by Color Scripter |
cs |
결과 화면

변수 속성(SpringEL)
단순 변수가 아니라 필드값을 갖고 있는 변수를 조회하기 위해 SpringEL 표현식을 사용한다. User라는 static class를 만들고, 해당 객체를 컨트롤러의 model에 다양한 타입 형태로 넣어준다. 아래 html 코드와 같은 문법으로 작성하면 된다.
특히, 지역변수를 선언하고 싶을때는 태그 안에 th:with를 작성해주면 된다. 이렇게 설정된 지역변수는 해당 태그 안에서만 동작한다는 것에 유의하자.
java/hello/thymeleaf/basic/BasicController.java
| 1 2 3 4 5 6 7 8 9 10 11 12 13 14 15 16 17 18 19 20 21 22 23 24 25 26 27 28 29 30 |
@GetMapping("variable") public String variable(Model model) { User userA = new User("ben", 10); User userB = new User("charlie", 20); ArrayList<User> list = new ArrayList<>(); list.add(userA); list.add(userB); HashMap<String, User> map = new HashMap<>(); map.put("userA", userA); map.put("userB", userB); model.addAttribute("user", userA); model.addAttribute("users", list); model.addAttribute("userMap", map); return "basic/variable"; } @Data static class User { private String username; private int age; public User(String username, int age) { this.username = username; this.age = age; } } Colored by Color Scripter |
cs |
resources/templates/basic/variable.html
| 1 2 3 4 5 6 7 8 9 10 11 12 13 14 15 16 17 18 19 20 21 22 23 24 25 26 27 28 29 30 31 32 33 34 |
<!DOCTYPE html> <html xmlns:th="http://www.thymeleaf.org"> <head> <meta charset="UTF-8"> <title>Title</title> </head> <body> <h1>SpringEL 표현식</h1> <ul>Object <li>${user.username} = <span th:text="${user.username}"></span></li> <li>${user['username']} = <span th:text="${user['username']}"></span></li> <li>${user.getUsername()} = <span th:text="${user.getUsername()}"></span></li> </ul> <ul>List <li>${users[0].username} = <span th:text="${users[0].username}"></span></li> <li>${users[0]['username']} = <span th:text="${users[0]['username']}"></span></li> <li>${users[0].getUsername()} = <span th:text="${users[0].getUsername()}"></span></li> </ul> <ul>Map <li>${userMap['userA'].username} = <span th:text="${userMap['userA'].username}"></span></li> <li>${userMap['userA']['username']} = <span th:text="${userMap['userA']['username']}"></span></li> <li>${userMap['userA'].getUsername()} = <span th:text="${userMap['userA'].getUsername()}"></span></li> </ul> <h1>지역 변수 - (th:with)</h1> <div th:with="first=${users[0]}"> <p>처음 사람의 이름은 <span th:text="${first.username}"></span></p> </div> </body> </html> Colored by Color Scripter |
cs |
기본 및 편의 객체
HttpServletRequest, session, Locale 정보 등 Http와 관련한 기본 객체, 스프링 빈 등의 편의 객체를 조회할 수 있는 문법에 대해 알아본다. 대표적으로 session과 bean의 정보를 출력하기 위해서 Controller 부분에 session을 설정해주고, @Component로 Bean을 생성해주었다.
html 코드에서 "${ } " 내부에 #과 request, response 등 미리 정해진 예약어를 이용하여 기본 객체들을 불러오는 것을 확인할 수 있다. param.paramData, session.sessionData, @Bean이름.클래스 등으로 빈을 조회할 수도 있다.
원래 스프링에서는 Bean 이름을 해당 Component의 클래스 이름에서 첫글자만 소문자로 지정해주기 때문에 따로 @Component 어노테이션 옆에 빈 이름을 지정할 필요가 없지만, 여기서는 thymeleaf 조회 시 에러가 발생하여 따로 지정해주었다. (html파일에서 @helloBean으로 지정 시, Bean 찾을 수 없음 에러)
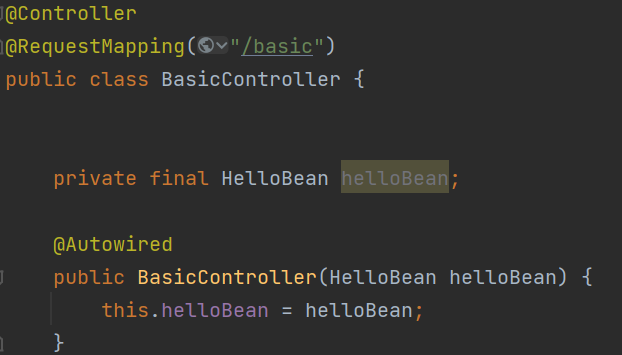
--> 또는 HelloBean을 static으로 생성하는 것이 아니라, 따로 HelloBean 클래스를 만들고 BasicController에서 의존관계 주입을 받는 형태로 빈을 만들면 굳이 @Component 어노테이션에 빈 이름을 직접 지정하지 않더라도 정상적으로 작동한다.

java/hello/thymeleaf/basic/BasicController.java
| 1 2 3 4 5 6 7 8 9 10 11 12 |
@GetMapping("/basic-objects") public String basicObjects(HttpSession session) { session.setAttribute("sessionData", "Hello Session"); return "basic/basic-objects"; } @Component("helloBean") static class HelloBean { public String hello(String data) { return "Hello " + data; } } Colored by Color Scripter |
cs |
resources/templates/basic/basic-objects.html
| 1 2 3 4 5 6 7 8 9 10 11 12 13 14 15 16 17 18 19 20 21 22 23 24 25 26 27 |
<!DOCTYPE html> <html xmlns:th="http://www.thymeleaf.org"> <head> <meta charset="UTF-8"> <title>Title</title> </head> <body> <h1>식 기본 객체 (Expression Basic Objects)</h1> <ul> <li>request = <span th:text="${#request}"></span></li> <li>response = <span th:text="${#response}"></span></li> <li>session = <span th:text="${#session}"></span></li> <li>servletContext = <span th:text="${#servletContext}"></span></li> <li>locale = <span th:text="${#locale}"></span></li> </ul> <h1>편의 객체</h1> <ul> <li>Request Parameter = <span th:text="${param.paramData}"></span></li> <li>session = <span th:text="${session.sessionData}"></span></li> <li>spring bean = <span th:text="${@helloBean.hello('Spring!')}"></span></li> </ul> </body> </html> Colored by Color Scripter |
cs |
유틸리티 객체와 날짜
유틸리티 객체는 다음과 같이 아주 다양하게 지원해준다.
#message : 메시지, 국제화
#uris : URI 이스케이프
#dates : 날짜(java.util.Date) 서식
#calendars : java.util.Calendar 서식
#temporals : 자바8 날짜 서식
#numbers : 숫자 서식
#strings : 문자 관련 편의 기능
#objects : 객체 관련 기능
#bools : boolean 관련 기능
#arrays : 배열 관련 기능
#lists, #sets, #maps : 컬렉션 관련 기능
#ids : 아이디 처리 관련 기능
예제로 #temporals 기능을 확인해보자. 날짜의 경우 자바8 날짜인 LocalDate, LocalDateTime, Instant 를 사용하기 위해서는 타임리프에 "thymeleaf-extras-java8time" 라이브러리를 추가해야 한다. 그러나 스프링부트를 사용하는 경우 스프링부트가 해당 라이브러리를 자동으로 추가해준다.
java/hello/thymeleaf/basic/BasicController.java
| 1 2 3 4 5 |
@GetMapping("/date") public String date(Model model) { model.addAttribute("localDateTime", LocalDateTime.now()); return "basic/date"; } Colored by Color Scripter |
cs |
resources/templates/basic/date.html
| 1 2 3 4 5 6 7 8 9 10 11 12 13 14 15 16 17 18 19 20 21 22 23 24 25 26 27 28 29 30 31 32 |
<!DOCTYPE html> <html xmlns:th="http://www.thymeleaf.org"> <head> <meta charset="UTF-8"> <title>Title</title> </head> <body> <h1>LocalDateTime</h1> <ul> <li>default = <span th:text="${localDateTime}"></span></li> <li>yyyy-MM-dd HH:mm:ss = <span th:text="${#temporals.format(localDateTime, 'yyyy-MM-dd HH:mm:ss')}"></span></li> </ul> <h1>LocalDateTime - Utils</h1> <ul> <li>${#temporals.day(localDateTime)} = <span th:text="${#temporals.day(localDateTime)}"></span></li> <li>${#temporals.month(localDateTime)} = <span th:text="${#temporals.month(localDateTime)}"></span></li> <li>${#temporals.monthName(localDateTime)} = <span th:text="${#temporals.monthName(localDateTime)}"></span></li> <li>${#temporals.monthNameShort(localDateTime)} = <span th:text="${#temporals.monthNameShort(localDateTime)}"></span></li> <li>${#temporals.year(localDateTime)} = <span th:text="${#temporals.year(localDateTime)}"></span></li> <li>${#temporals.dayOfWeek(localDateTime)} = <span th:text="${#temporals.dayOfWeek(localDateTime)}"></span></li> <li>${#temporals.dayOfWeekName(localDateTime)} = <span th:text="${#temporals.dayOfWeekName(localDateTime)}"></span></li> <li>${#temporals.dayOfWeekNameShort(localDateTime)} = <span th:text="${#temporals.dayOfWeekNameShort(localDateTime)}"></span></li> <li>${#temporals.hour(localDateTime)} = <span th:text="${#temporals.hour(localDateTime)}"></span></li> <li>${#temporals.minute(localDateTime)} = <span th:text="${#temporals.minute(localDateTime)}"></span></li> <li>${#temporals.second(localDateTime)} = <span th:text="${#temporals.second(localDateTime)}"></span></li> <li>${#temporals.nanosecond(localDateTime)} = <span th:text="${#temporals.nanosecond(localDateTime)}"></span></li> </ul> </body> </html> Colored by Color Scripter |
cs |
URL 링크
java/hello/thymeleaf/basic/BasicController.java
| 1 2 3 4 5 6 |
@GetMapping("link") public String link(Model model) { model.addAttribute("param1", "data1"); model.addAttribute("param2", "data2"); return "basic/link"; } Colored by Color Scripter |
cs |
resources/templates/basic/link.html
| 1 2 3 4 5 6 7 8 9 10 11 12 13 14 15 16 17 |
<!DOCTYPE html> <html xmlns:th="http://www.thymeleaf.org"> <head> <meta charset="UTF-8"> <title>Title</title> </head> <body> <h1>URL 링크</h1> <ul> <li><a th:href="@{/hello}">basic url</a></li> <li><a th:href="@{/hello(param1=${param1}, param2=${param2})}">hello query param</a></li> <li><a th:href="@{/hello/{param1}/{param2}(param1=${param1}, param2=${param2})}">path variable</a></li> <li><a th:href="@{/hello/{param1}(param1=${param1}, param2=${param2})}">path variable + query parameter</a></li> </ul> </body> </html> Colored by Color Scripter |
cs |
3개의 URL이 순서대로 아래 URL에 매칭된다. 각 파라미터를 표기없이 소괄호 () 안에만 넣으면 쿼리파라미터 형식이 되고, 표기 후 소괄호 안에 추가로 넣어주면 path variable 형태로 표시되는 것을 확인할 수 있다.
/hello?param1=data1¶m2=data2
/hello/data1/data2
/hello/data1?param2=data2
리터럴(literal)
리터럴은 문자 그대로 문자 그대로라는 뜻이다 ㅎㅎ. hello 라고 썼을 때 hello 라는 문자열로 표기되면 리터럴이고, 이것이 변수로 표현된다면 리터럴이 아니다. 타임리프에는 4가지 리터럴이 있다.
문자 : 'hello'
숫자 : 1
불린 : true, false
null : null
문자 리터럴은 항상 작은 따옴표로 감싸야 한다. 다만 띄어쓰기 없이 연속적으로 이루어진 문자열은 작은 따옴표를 쓰지 않아도 된다. 예를들어 hello 같은 경우는 작은 따옴표가 없어도 되지만, 아래 코드에서 볼 수 있는 것처럼 'hello world!' 같은 경우는 작은 따옴표가 있어야만 리터럴로 처리된다. 따옴표처리가 없으면 서버에서 에러가 나게 된다.
리터럴끼리 더할수도 있고, 리터럴+변수 합산도 가능하다. 리터럴을 대체하는 | | 문법을 쓰면 덧셈 연산자 +를 쓰지 않아도 된다.
java/hello/thymeleaf/basic/BasicController.java
| 1 2 3 4 5 |
@GetMapping("/literal") public String literal(Model model) { model.addAttribute("data", "Spring!"); return "basic/literal"; } Colored by Color Scripter |
cs |
resources/templates/basic/literal.html
| 1 2 3 4 5 6 7 8 9 10 11 12 13 14 15 16 17 18 19 |
<!DOCTYPE html> <html xmlns:th="http://www.thymeleaf.org"> <head> <meta charset="UTF-8"> <title>Title</title> </head> <body> <h1>리터럴</h1> <ul> <!--주의! 다음 주석을 풀면 예외가 발생함--> <!-- <li>"hello world!" = <span th:text="hello world!"></span></li>--> <li>'hello' + ' world!' = <span th:text="'hello' + ' world!'"></span></li> <li>'hello world!' = <span th:text="'hello world!'"></span></li> <li>'hello ' + ${data} = <span th:text="'hello ' + ${data}"></span></li> <li>리터럴 대체 |hello ${data}| = <span th:text="|hello ${data}|"></span></li> </ul> </body> </html> Colored by Color Scripter |
cs |
연산(operation)
산술식, 조건식에 따라 연산의 결과를 표시할 수 있다.
Elvis 연산자의 경우 ?: 기호를 이용하여 삼항연산자처럼 조건이 true이면 ?: 기호 앞의 결과를, false이면 ?:기호 뒤의 결과를 반영한다. 엘비스 프레슬리를 닮아서 이름이 Elvis 연산자라고 한다.ㅎㅎ

언더바 _ 를 조건에 넣으면, No operation, 즉 연산을 하지 않겠다는 의미가 된다. 이렇게 되면 그냥 태그와 HTML 컨텐츠만 표시하게 된다.
<span ...... > 내용 </span> 인 경우, 원래는 "내용" 부분을 무시하고 <span> 태그 안의 타임리프 텍스트가 출력되야하지만, No operation이 적용되면 마치 타임리프 문법이 적용되지 않는 것처럼 <span> 내용 </span> 이 되어 "내용" 부분만 HTML로 출력되게 된다.
java/hello/thymeleaf/basic/BasicController.java
| 1 2 3 4 5 6 |
@GetMapping("/operation") public String operation(Model model) { model.addAttribute("nullData", null); model.addAttribute("data", "Spring!"); return "basic/operation"; } Colored by Color Scripter |
cs |
resources/templates/basic/operation.html
| 1 2 3 4 5 6 7 8 9 10 11 12 13 14 15 16 17 18 19 20 21 22 23 24 25 26 27 28 29 30 31 32 33 34 35 36 37 38 39 40 41 42 43 44 45 46 47 |
<!DOCTYPE html> <html xmlns:th="http://www.thymeleaf.org"> <head> <meta charset="UTF-8"> <title>Title</title> </head> <body> <ul> <li>산술 연산 <ul> <li>10 + 2 = <span th:text="10 + 2"></span></li> <li>10 % 2 == 0 = <span th:text="10 % 2 == 0"></span></li> </ul> </li> <li>비교 연산 <ul> <li>1 > 10 = <span th:text="1 > 10"></span></li> <li>1 gt 10 = <span th:text="1 gt 10"></span></li> <li>1 >= 10 = <span th:text="1 >= 10"></span></li> <li>1 ge 10 = <span th:text="1 ge 10"></span></li> <li>1 == 1 = <span th:text="1 == 10"></span></li> <li>1 != 1 = <span th:text="1 != 10"></span></li> </ul> </li> <li>조건식 <ul> <li>(10 % 2 == 0)? '짝수':'홀수' = <span th:text="(10 % 2 == 0)? '짝수':'홀수'"></span></li> </ul> </li> <li>Elvis 연산자 <ul> <li>${data}?: '데이터가 없습니다.' = <span th:text="${data}?: '데이터가 없습니다.'"></span></li> <li>${nullData}?: '데이터가 없습니다.' = <span th:text="${nullData}?: '데이터가 없습니다.'"></span></li> </ul> </li> <li>No-Operation <ul> <li>${data}?: _ = <span th:text="${data}?: _">데이터가 없습니다.</span></li> <li>${nullData}?: _ = <span th:text="${nullData}?: _">데이터가 없습니다.</span></li> </ul> </li> </ul> </body> </html> Colored by Color Scripter |
cs |
속성값 설정
속성값의 설정도 th:* 문법을 이용한다.
속성 치환의 경우 th:속성값을 적어주면 된다. 아래 코드에서와 같이 th:name ="userA"라고 지정하면, 서버 구동 시에 name = "mock" 속성이 사라지고 name = "userA" 속성으로 대체된다. 다만 SSR 방식이기 때문에, 직접 html 파일을 열어서 확인해보면, name = "mock", th:name = "userA"가 둘다 표기되는 것을 확인할 수 있다.
속성의 추가는 th:attrappend, th:attrprepend, th:classappend 방식을 이용한다. append 방식은 기존 속성의 뒤에, prepend 방식은 기존 속성의 앞에 추가된다. 이 경우에는 반드시 띄어쓰기를 해주어야 한다. classappend는 클래스에 지정한 이름의 클래스를 추가해주는 방식이다.
체크박스에 응용할 수 있는 th:checked 속성도 유용하다. 기본 HTML에서는 <input> 태그의 checked 속성이 true 이든, false 이든 상관없이 화면상에 이미 체크가 된 형태로 표기된다. 원래는 이를 막기 위해서 조건문을 적용하는 등의 번거로운 추가 작업을 해주어야 하지만, th:checked 속성을 이용하면 직관적이고 편하게 check 박스의 상태를 조절할 수 있게 된다.
java/hello/thymeleaf/basic/BasicController.java
| 1 2 3 4 |
@GetMapping("/attribute") public String attribute() { return "basic/attribute"; } |
cs |
resources/templates/basic/attribute.html
| 1 2 3 4 5 6 7 8 9 10 11 12 13 14 15 16 17 18 19 20 21 22 23 |
<!DOCTYPE html> <html xmlns:th="http://www.thymeleaf.org"> <head> <meta charset="UTF-8"> <title>Title</title> </head> <body> <h1>속성 설정</h1> <input type="text" name="mock" th:name="userA" /> <h1>속성 추가</h1> - th:attrappend = <input type="text" class="text" th:attrappend="class=' large'" /><br/> - th:attrprepend = <input type="text" class="text" th:attrprepend="class='large '" /><br/> - th:classappend = <input type="text" class="text" th:classappend="large" /><br/> <h1>checked 처리</h1> - checked o <input type="checkbox" name="active" th:checked="true" /><br/> - checked x <input type="checkbox" name="active" th:checked="false" /><br/> - checked=false <input type="checkbox" name="active" checked="false" /><br/> </body> </html> Colored by Color Scripter |
cs |
다음 글에서 계속...
참조
1. 인프런_스프링 MVC 2편 - 백엔드 웹개발 핵심 기술_김영한 님 강의
https://www.inflearn.com/course/%EC%8A%A4%ED%94%84%EB%A7%81-mvc-2
'Programming-[Backend] > Spring' 카테고리의 다른 글
| [스프링 웹MVC-2] 3. 타임리프/스프링으로 폼 양식 만들기 - th:object, th:field, 체크박스, 라디오 버튼, 셀렉트 박스 (0) | 2021.08.16 |
|---|---|
| [스프링 웹MVC-2] 2. 타임리프 기본 - 2 : 대표 문법 공부 계속 - 반복, 조건, 주석, 블록, 자바스크립트, 템플릿, 레이아웃 (0) | 2021.08.16 |
| [스프링 웹MVC] 14. 웹페이지 실습 ; PRG 패턴, RedirectAttributes (0) | 2021.08.14 |
| [스프링 웹MVC] 13. 스프링 MVC - HTTP 메시지 컨버터, 요청 매핑 핸들러 어댑터 구조 (0) | 2021.08.14 |
| [스프링 웹MVC] 12. 스프링 MVC - 응답 정보 처리 기능 (0) | 2021.08.12 |


